Wednesday, December 12, 2012

Bacon and Herb Risotto

I love risotto.  Unfortunately this tasty rice dish has developed the reputation for being time consuming and difficult to make.  It really isn't. You can serve a basic white risotto as an accompaniment to a saucy dish, dress it up with sophisticated add-ins as a fancy side dish or pair it with a green salad and serve it alone as an entree for a quick weeknight dinner.  Rice is the perfect palliate to build off of and I think all home cooks should have a good risotto recipe in their repertoire.  
I no longer use a written recipe when I make my risotto; rather I use a standard formula of liquid to rice and add in whatever ingredients sound good or I have on hand at the time.  For the intimidated or new risotto maker, Maxine Clark's Risotto is a great primer for learning about the importance of choosing the correct rice (yes, this does make a difference) and the role each component plays in completing the dish.  Her recipes can provide inspiration for flavor combinations to get you started.  I find that homemade broth is best.  Whenever I don't have the time to make my own (which is usually the case) a low sodium store bought version will work.  Full sodium versions tend to be too salty and you want to be able to taste your ingredients, and not the salt.  


BACON AND HERB RISOTTO


1 1/2 cups arborio rice
4 to 4 1/2 cups hot vegetable broth
6 slices bacon, diced
1 small onion, finely chopped
1/2 cup dry white wine
1/2 cup finely chopped herbs (I used thyme and sage)
1 cup finely grated Parmesan cheese
Freshly ground pepper


1)  Place the bacon in a heavy sauce pan, place over medium high heat and cook until crisp, stirring
     occasionally.  

2)  Reduce the heat to medium.  Add the onion and saute until soft, 5-7 minutes.

3)  Add the rice and stir. Cook until the rice is translucent, 1-2 minutes.

4)  Add the wine and cook until absorbed, 1-2 minutes.


5)  Gradually add the hot broth a 1/2 cup at a time.  Stir regularly, but not constantly, until broth is
     almost absorbed.  Add broth as needed and continue to cook until rice is al dente--or to your
     individual liking.   The risotto should be moist and have some liquids in it since it will continue to
     thicken as it sits.  You may not use all of the broth.


6)  Off the heat.  Add the chopped herbs and ground pepper and stir to combine.


7)  Stir in the cheese and stir until it is completely combined and melted.


8)  Serve immediately with more freshly grated cheese as desired.

Sunday, December 9, 2012

Corn & Vegetable Chowder

With the cold weather upon us, nothing tastes better than a hot bowl of soup. When paired with some crusty bread it makes the perfect lunch or light dinner.  This soup started as a corn chowder but I've added a variety of vegetables to give it more interest and body.  It is surprisingly easy to make and comes together quickly making it an ideal weeknight dinner.  You can use whatever vegetables you have on hand.  Just make sure that you don't overcook any starchy vegetables.


CORN AND VEGETABLE CHOWDER

4 ounces pancetta, diced
1 medium onion, diced
1 stalk celery, diced
2 medium carrots, diced
1 red bell pepper, diced
2 bay leaves
1 cup baby red potatoes, skins on diced
1 1/2 cups corn, fresh if available, canned or frozen if not
1 cup heavy cream
3 1/2 cups whole milk
Salt and fresh ground pepper to taste
1/4 cup dry sherry

1) In a heavy soup pot over medium-high heat, cook the pancetta until browned, stirring occasionally.

With bacon as a base, how can you go wrong?


2)  Reduce the heat to medium.  Add the onion, celery, carrots, bell pepper, and bay leaves.  Cook 8-10
     minutes or until vegetables have softened.

Lots of veggies.  You can add just about any that you have on hand


3)  Add the potatoes and corn then stir in the cream and milk.  Season with salt and pepper

There's a full serving of vegetables in every bowlful


4)  Bring to almost a simmer.  Reduce the heat to low and cover.  Cook for 30 minutes or until the
     potatoes are tender.

5)  Adjust seasoning and swirl in the sherry.

Enjoy!

Wednesday, December 5, 2012

Frangelico Crinkles

For me, nothing says Christmas more than plates of freshly baked cookies.  Traditional sugar and gingerbread cookies are nice but in order to add an element of surprise to my cookie plates I always make sure I include one or two new types each year.  However, as much as I love chocolate, I usually shy away from chocolate based cookies since their presence on the cookie tray is often overpowering.  This year I stumbled upon a chocolate cookie that sounded too good to resist.  Combining the amazing flavors of dark chocolate and hazelnut, these Frangelico crinkle cookies from Mary Lee's Desserts in Vienna, Virginia were too decadent and enticing to pass up.  The sophisticated flavor combination makes this a very adult cookie.  As an added bonus you can freeze them so they can be made ahead of time and brought out for any cookie giving occasion that pops up.

Don't let the batter like dough scare you.  Once it sits in the refrigerator it firms up and the result is a dough that is the perfect consistency.


FRANGELICO CRINKLES

1 1/4 cups flour
1 Tablespoon baking powder
1/2 Teaspoon salt
12 ounces top-quality dark baking chocolate, chopped
6 Tablespoons chilled, unsalted butter, cut into small pieces
2 extra-large eggs, at room temperature
1/2 cup plus 3 Tablespoons sugar
1 Tablespoon vanilla extract
1/4 cup heavy whipping cream
6 Tablespoons Frangelico liqueur
1 cup confectioners' sugar, sifted

1)  Sift together the flour, baking powder, and salt.

2)  Hear a few inches of water in a medium sized saucepan over medium heat.  Combine the chocolate
     and butter in a heat proof bowl that is large enough to sit over the saucepan.  Heat just long enough
     for them to melt, stirring to incorporate.  Remove from the heat.

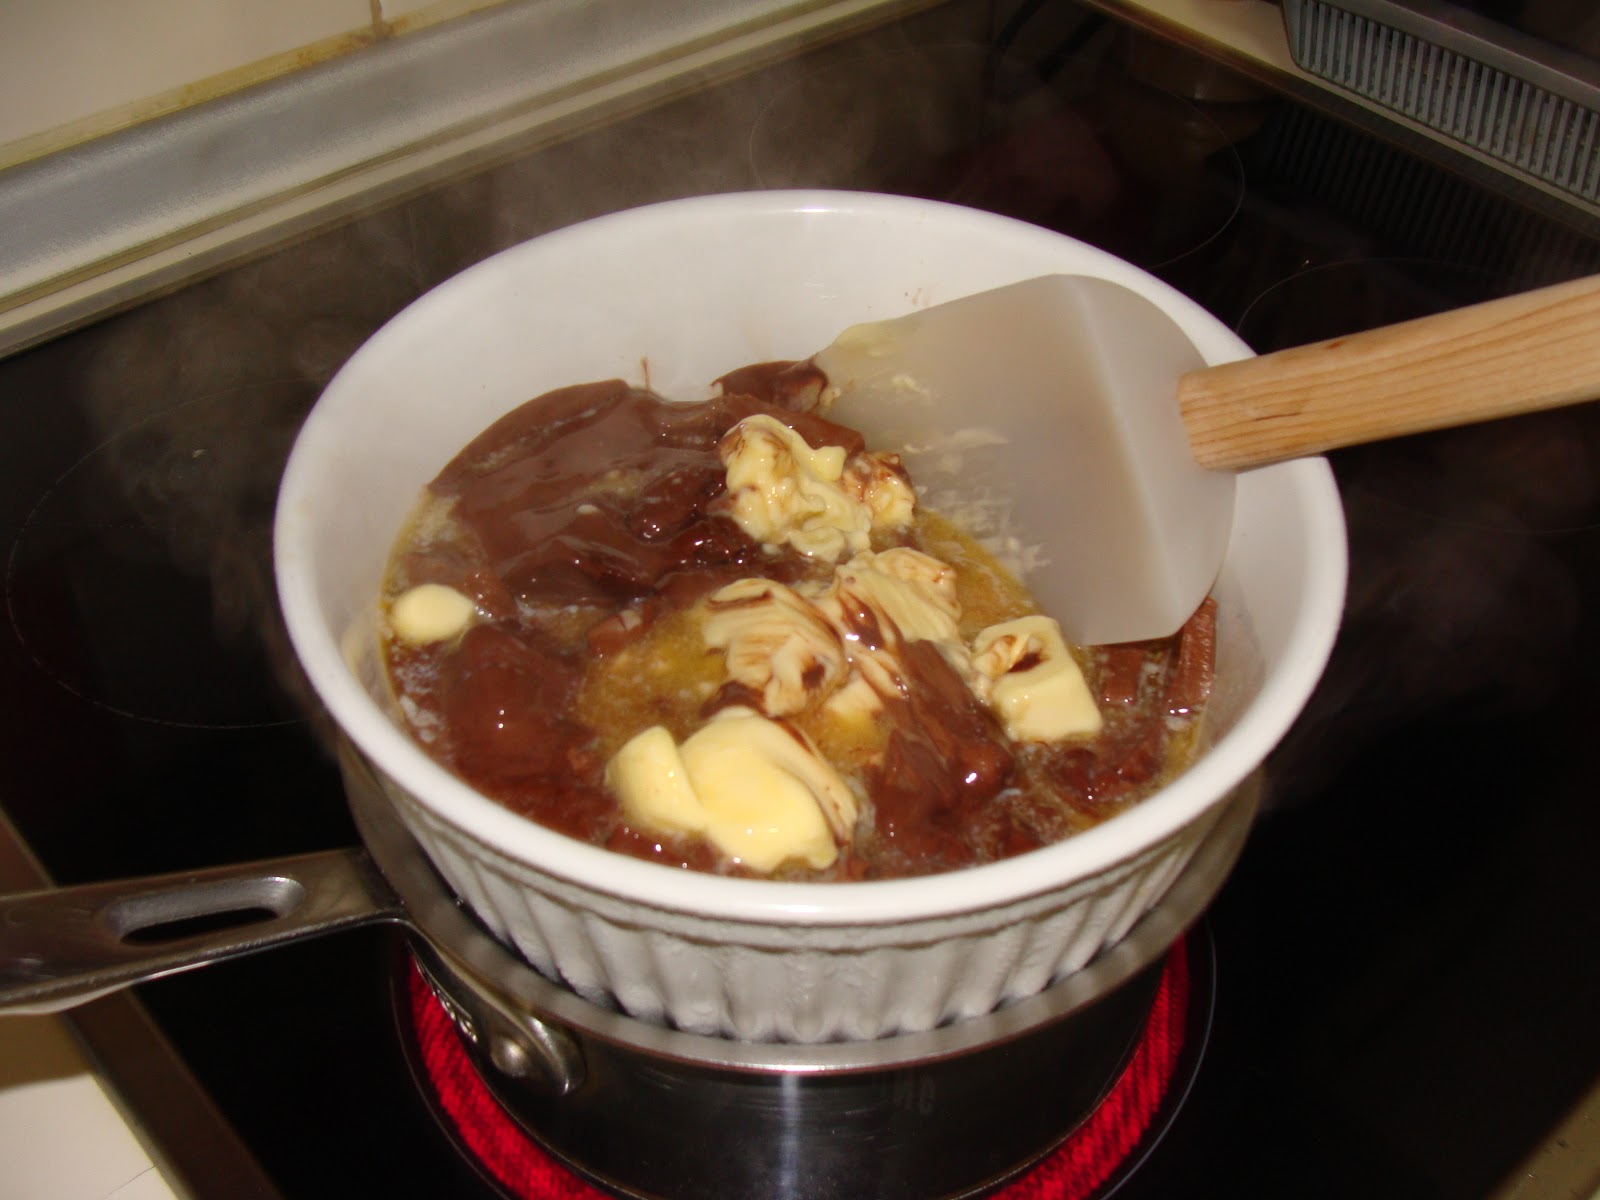
Chocolate and butter melting


3)  Whisk together the eggs and sugar by hand in a mixing bowl until the mixture has lightened in
      color.

Eggs and sugar


4)  Add the cooled chocolate mixture, vanilla extract, cream, and liqueur, stirring to incorporate, then
      gently and gradually fold in the flour mixture to form a soft dough.


5)  Cover and refrigerate for at least 3 hours and up to overnight.

6)  Preheat the oven to 350 F degrees.  Line several baking sheets with parchment paper. Place the
     sifted confectioners' sugar on a plate.

7)  Shape a heaping tablespoon of dough into a ball, then roll to coat completely in the confectioners'
     sugar.  Repeat to use all of the dough, spacing the dough balls 2 inches apart on the baking sheets.
     Bake one sheet at a time for 9 to 11 minutes; the cookies will be puffed and cracked but soft in the
     center.  Do not over bake.


8)  Remove from the oven.  Cool for 2 minutes on the sheet; transfer the cookies to a wire rack and cool
     completely before serving or storing.

Ready to come out of the oven


YIELDS:  36 cookies

The cookies may be stored in an airtight tin for up to 2 days or frozen for up to 1 month.


Sunday, December 2, 2012

Olive You Two


Olives the easy way
I love all types of olives.  In college I used to keep jars of them in my mini refrigerator for midnight snacks.  They only kind I have ever tried and not liked are the nasty black ones whose slices grace pizzas in the United States.  No matter how much I try I can't get the metallic taste that accompanies them out of my mind.   One of the things that excited me most about moving to a Mediterranean country was the potential for a great variety of olives.  And I certainly haven't been disappointed.  The largest outdoor market in Tirana sells barrels and barrels of this tiny fruit; tastes vary depending upon the region in which they were grown and eager vendors are always quick to offer samples so you can take home exactly what you are looking for.  Visiting the olive vendors is my favorite part of the market experience and I never leave empty handed.  I am the only olive eater in the Brown household but that doesn't stop me from from toting home bags of them.

Green olives ready for curing
With fall upon us and olives at their prime, I decided to try to cure my own olives this year.  Yes, I could just buy my olives from the central fruit market, or from just about any of the tiny neighborhood markets in Tirana, but where is the fun in that? Besides, I was assured that the process wasn't hard- just tedious and time consuming- but my efforts would be well worth it. So on my last market trip I came home with a large bag of the little green beauties.

All of the various online recipes and Albanians I consulted agreed that the first step to curing olives is soaking them. Fresh olives are indelibly bitter but this bitterness can be removed through a series of water baths.  In order for this soak be be effective, the flesh of each olive needs to be split.  I tried smashing the olives with a rolling pin but this technique resulted in crushing the fruit.  A hammer didn't garner much better results (although I did hit my fingers a time or two). I finally decided to slice a small "x" on each fruit with a paring knife.  The technique is similar to what I do when roasting chestnuts.  While not difficult, it was time consuming especially since it is important not to pierce the pit.

Mid soak
The next step was to soak the fruit in water in a dark room.  Over the course of two weeks, I changed my soaking water daily until all of the bitterness was removed from the olives. Unfortunately, I tasted my share of bitter olives during the last few days of the soaking process.

The seasonings
After soaking for two weeks, it was time to season and further cure the olives.  I made a brine of three cups water and two tablespoons of salt.  After bringing this mixture to a boil I set it aside to cool to room temperature.  Next, in a small bowl I mixed together two fresh lemons, cubes with their rinds still intact, a healthy two tablespoons of dried sage, sea salt, six cloves of fresh garlic that had been sliced in half, and a few red pepper flakes.

The final cure
Finally I gave the olives a final rinse under cold water then placed them in a large jar (I was so excited when I found these jars in the local store.  At the time I had no idea what I was going to use them for but they were just too cool to pass up).  I sprinkled my seasonings over the top of the olives, poured in my brine then drizzled some olive oil over the top of it all.  The jar was then sealed up and placed back onto the shelf to cure for an additional two weeks.

The verdict?  Surprisingly good. I have to admit, I was a bit nervous about how they would turn out. I served them as part of my pre-Thanksgiving dinner appetizers. Several of our guests cure their own olives so that added to my anxiety but my worry was apparently for nothing.  We ate a couple of bowlfuls and I still have plenty to share (or not) at future events.  Maybe next time I bring them out I'll even be able to get Glenn to try one.

Dig in (even my olive bowl is hand made in Albania)

This past weekend I was lucky enough to be able to further fulfill my love of all things olive by participating in an olive oil pressing.  You are read about it here.